Service Group Master
Service Group Master - User Guide
ℹ️
📈 Business Impact
The Service Group Master is the “Efficiency Engine” of your billing process. By grouping individual services (Water, Lift, Security) into predefined “packets,” you enable Instant Bulk Invoicing, ensuring that 500+ members are billed correctly in a single click without manual data entry.
⚡ Quick Start: Building a Billing Packet
- Access: Navigate to System Tools > Service Group Master.
- Create: Click Create Main and name your group (e.g., “Regular 2BHK”).
- Assemble: Go to the Tariff Rate Index within the group details and add all relevant Standard Tariffs that apply to this group.
- Deploy: Assign this Service Group to specific members in the Member Master.
🗺️ The Connection Flow
graph TD
    T1[Std Tariff: Water] --> Group[Service Group: Residential]
    T2[Std Tariff: Lift] --> Group
    T3[Std Tariff: Security] --> Group

    Group --> Members[Assigned to 100+ Members]
    Members --> Bulk[Make Multiple Invoices]

    style Group fill:#f9f,stroke:#333,stroke-width:2px
1. Introduction 📝
A Service Group is a collection of individual charges defined in the Standard Tariff Master. Instead of choosing five different charges for every invoice, you choose one Service Group, and the system automatically pulls all the linked charges and their rates.
2. Usage in Transactions 🔄
- 📄 Invoice Creation (Single): Selecting a Service Group instantly populates the invoice with all the pre-defined tariffs and their correct amounts.
- ⚡ Bulk Invoicing (Make Multiple Invoices): This is the primary module where Service Groups are used. The system scans each member’s linked group and generates hundreds of invoices based on these templates.
3. Related Reports 📊
- 🏛️ Service Group Inventory: Lists all groups and the total value of each (e.g., “Total billing for the Regular Group is ₹4,500”).
- 📉 Member-Group Mapping: Shows which members are currently linked to which billing groups.
4. Key Tools: The “Update Amount” Tool 🔧
If you increase a rate in the Standard Tariff Master (e.g., Water charges increase from ₹500 to ₹600), the Service Groups do not change automatically.
Action Required: You must go to the Service Group Details and click the Update Amount button. The system will then re-scan the tariffs and update the group totals.
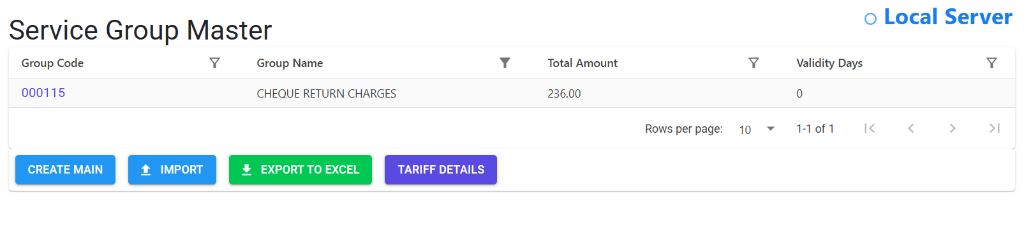
5. Interface Walkthrough 🔄
Browse Service Groups
The Service Group Master Index displays your society’s billing templates.
- Template Snapshot: View Group Names and their consolidated Total Amount in one view.
- Maintenance History: Track Validity Days for age-limited service structures.
- Component View: Click Tariff Details to see which individual charges make up the group total without leaving the index.
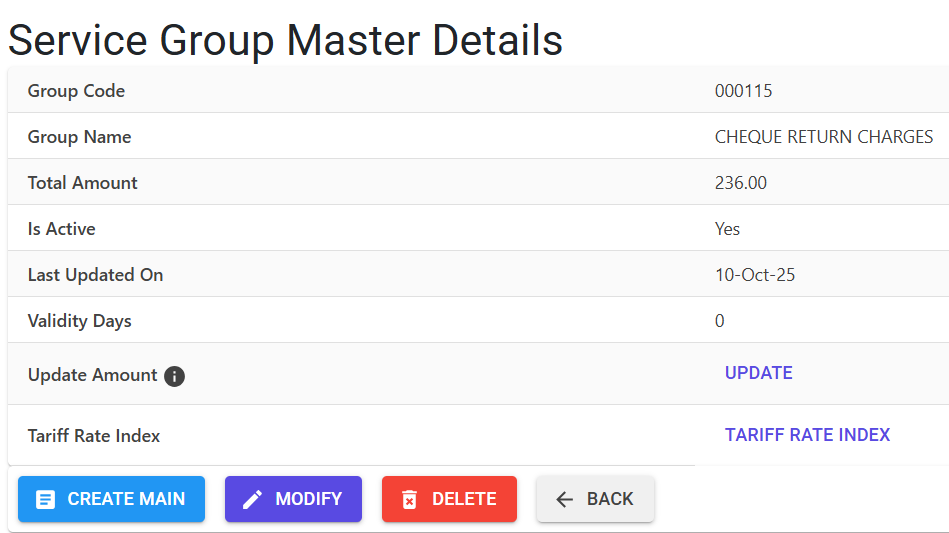
Manage Group Configuration
The Details View is where you synchronize the group with current market rates.
- Automatic Synchronization: Use the UPDATE button next to Update Amount to pull the latest pricing from individual Standard Tariffs.
- Composition Control: Access the TARIFF RATE INDEX to add or remove specific service components from this billing packet.
- Operational Profile: Review the Last Updated On timestamp to verify when rates were last reviewed and synced.
6. Validations and Error Handling ⚠️
| Validation Type | What is checked? | Error Message / Action |
|---|---|---|
| Zero Total | If the sum of all tariffs in a group is ₹0. | “You may not use this group as service amount is 0.” |
| Live Record | If trying to delete a group that has already been used in invoices. | “This master record is live you may not delete it.” |
| Active Status | If trying to use an In-Active group. | “Record is In-Active you may not Delete/Modify it.” |
7. Best Practices / Tips 💡
ℹ️
- Segment Your Groups: Create different groups for Residential, Commercial, and Shops to handle their different tariff structures efficiently.
- Verify After Updates: Always check the “Total Amount” of the Service Group after using the Update Amount tool to ensure it matches your expectations.
- Manage Validity: Use the “Validity Days” field if a specific group is only applicable for a temporary period.