Cheque Master
Cheque Master - User Guide
ℹ️
⚡ Quick Start: Adding a Chequebook
- Access: Navigate to Masters > Cheque Master.
- Setup: Click Create New and select the Bank Account (from Account Master).
- Range: Enter the From Cheque No and To Cheque No of your physical chequebook.
- Print Configuration: Set the dimensions (Top/Left margins) according to your bank’s specific cheque leaf format.
🗺️ Payment Life Cycle
graph LR
    Master[Cheque Master] --> Vouc[Payment Voucher]
    Vouc --> Print[Automated Cheque Print]
    Print --> Reg[Cheque Register Report]
    Reg --> Reco[Bank Reconciliation]

    style Master fill:#f9f,stroke:#333,stroke-width:2px
1. Introduction 📝
The Cheque Master is used to manage the physical chequebooks held by the society. It allows the system to auto-increment cheque numbers during payments and facilitates direct printing on the physical cheque leaves.
2. Usage in Transactions 🔄
- 🧾 Payment Vouchers: When creating a payment, the system identifies the next available number from the Cheque Master for the selected bank.
- 🖨️ Cheque Printing: Directly prints the Payee Name, Date, Amount (in words and figures), and “A/c Payee Only” on the cheque leaf.
- 🛑 Cheque Cancellation: Tracks “Voided” or “Cancelled” cheques to ensure the numeric sequence is always accounted for.
3. Related Reports 📊
- 📋 Cheque Register: A list of all cheques issued, including date, amount, vendor, and status.
- 📉 Cheque Position Report: Shows used vs. unused cheques in each registered chequebook.
- 🏦 Bank Recon: Identifies which issued cheques have been cleared by the bank and which are still “Outstanding.”
4. Key Configuration Fields 🔍
- Bank Account: Linkage to the specific ledger in the Account Master.
- Cheque Printing Margins: Fine-tune the position of text in millimeters (mm) for the Payee, Date, and Amount fields.
- Range (From/To): Ensures the system doesn’t generate numbers outside your actual chequebook.
5. Interface Walkthrough 🔄
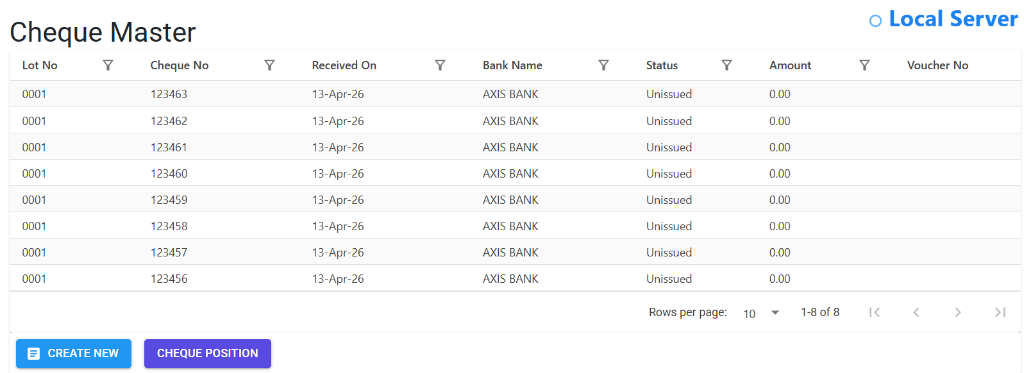
Browse Cheque Master
The Index Page provides a comprehensive view of all active chequebooks and issued cheques.
- Search & Filter: Quickly find cheques by Number, Bank, or Status (Issued/Unissued).
- Direct Access: Navigate to “Create New” or “Cheque Position” for configuration.
Configure Cheque Position
The Cheque Position screen is where you fine-tune the printing coordinates for your physical cheque leaves.
- Precision Control: Set exact X/Y positions for “A/c Payee”, “Date Box”, and “Payee Name”.
- Standard vs Custom: Compare standard system positions with your custom adjustments.
- Verification: Use the “Print Dummy Cheque” to verify alignment on plain paper.

6. Best Practices / Tips 💡
ℹ️
- Test Before You Print: Always print a sample on a plain A4 sheet first and hold it against a physical cheque leaf to verify margin accuracy.
- Cancel Unused: If a cheque leaf is physically damaged, mark it as “Cancelled” in the system to maintain the audit trail of that specific number.
- One Master per Book: Create a new record in the Cheque Master for every new chequebook received from the bank.
- Sync with Recon: Use the Cheque Master as your primary reference when performing monthly bank reconciliations.